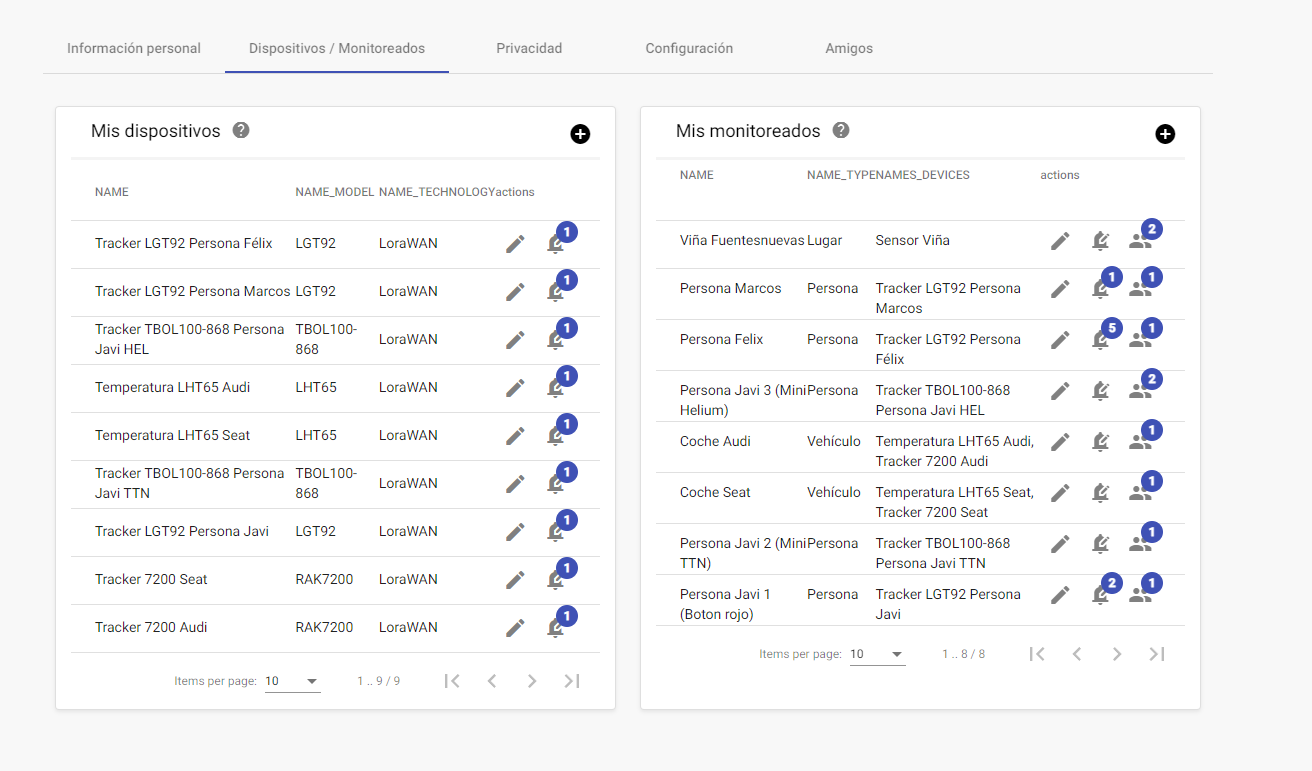
A monitored is a person, a plant, an animal or in general an object on which we are going to add devices.
A monitor can have several associated devices, for example a temperature measuring device, a co2 measuring device, a lux measuring device, etc. The measurement data sent by all the devices of a monitored are associated with that monitored and can be consulted in the form of a map, graph, table…
Since the data is associated with the monitored, the devices can be unlinked from a monitored without losing the historical data of a monitored. The histories are always saved in the monitor, so even if there are no associated devices, the history is not lost.
To create a monitored we must press + on the main screen:
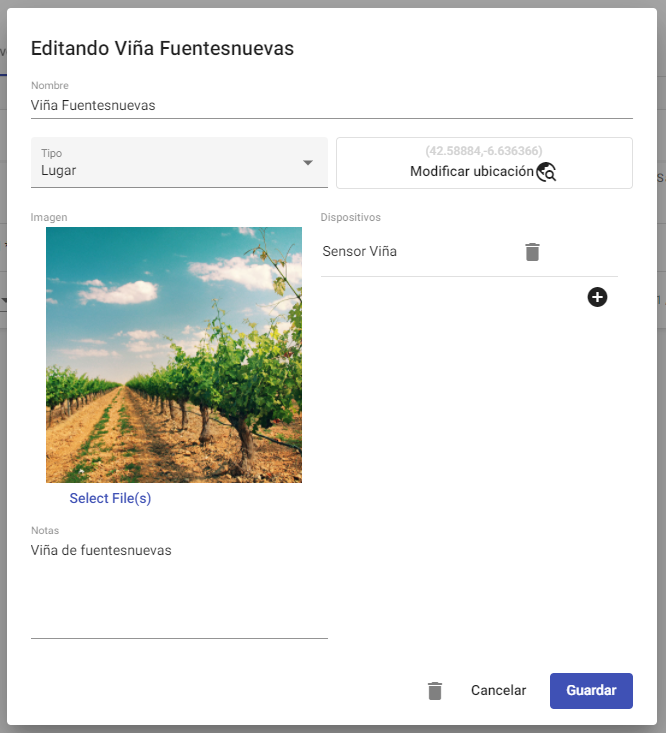
Where we will be asked for the monitored data:
We must enter:
Name: It is the name that we want to give to the monitored (for example vineyard)
Type: Defines the nature of the monitoring, it does not reduce or expand the rest of the options.
– Animal: It is used for pets, wild animals, etc…
– Place: It is used for sensors that are in a fixed location such as a farm, an industry, etc…
– Person: It is used for a person.
– Vehicle: It is used for a truck, car, motorcycle…
– Others: They are used for the rest of the objectives to be monitored that have not been contemplated in the previous cases.
Location selection field: We will set the coordinates on the map if we are facing a fixed monitor, since it does not move (such as a vineyard, an industrial facility…). If the monitored has a device with GPS, we should never mark this fixed location, since in this case we would be eliminating the option of using the actual GPS data received.
Image: Allows you to upload the photo you want.
Devices: By pressing the + we will add the devices that will be associated to that monitored. You can add as many devices as you want to a monitor.
Notes: We can put the annotations that we want.
We will proceed with saving the monitored and return to the main window.
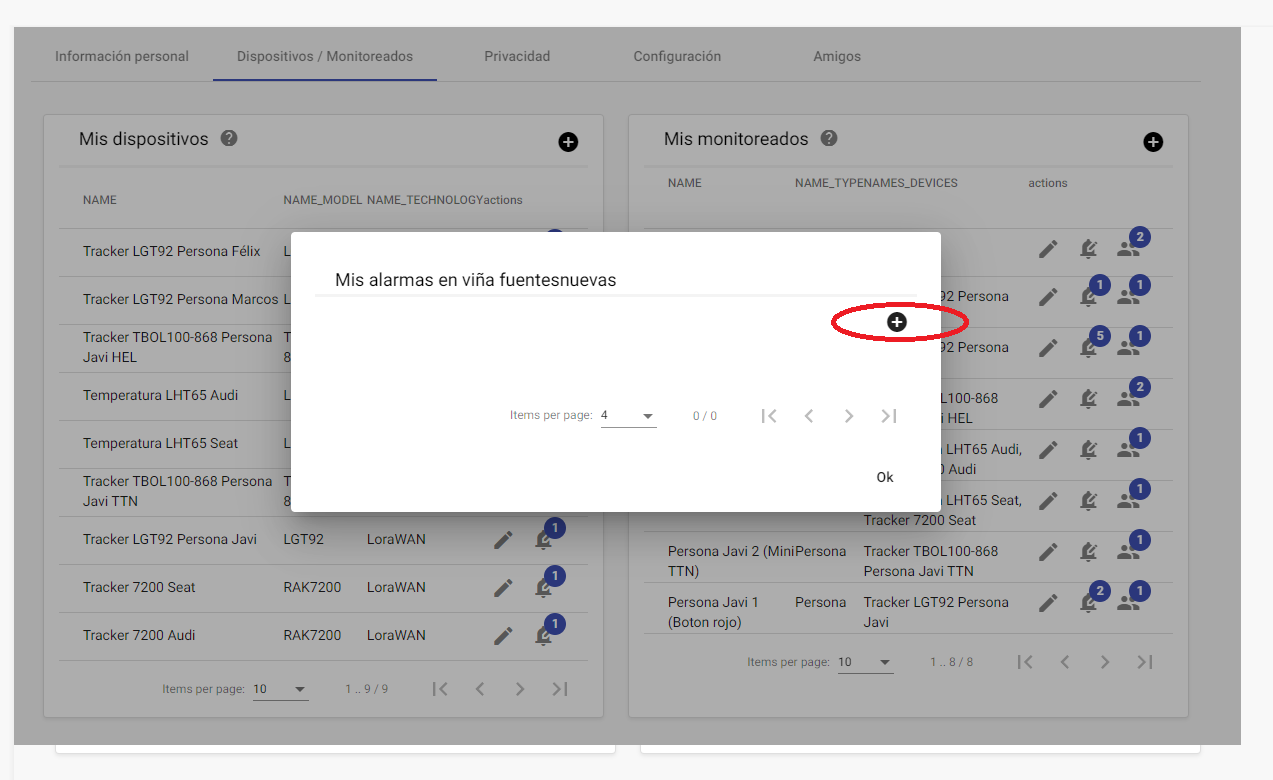
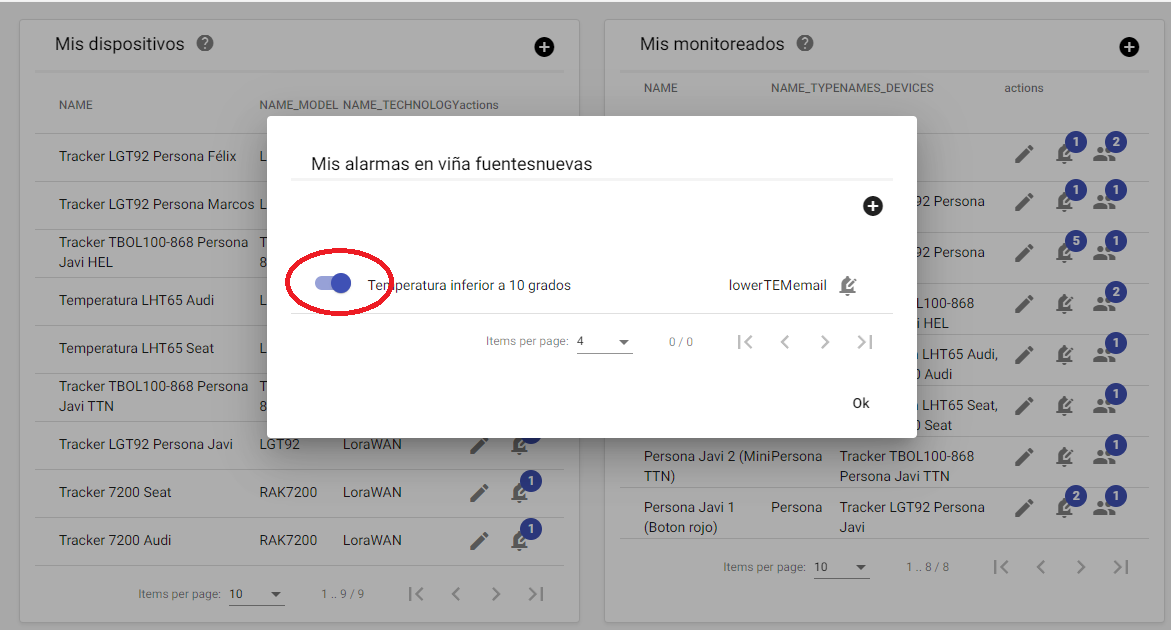
Once the monitor is created, we can edit it in the pen and also define alarms on it with the bell.
We can define the alarms we want.
To create them we just have to press +
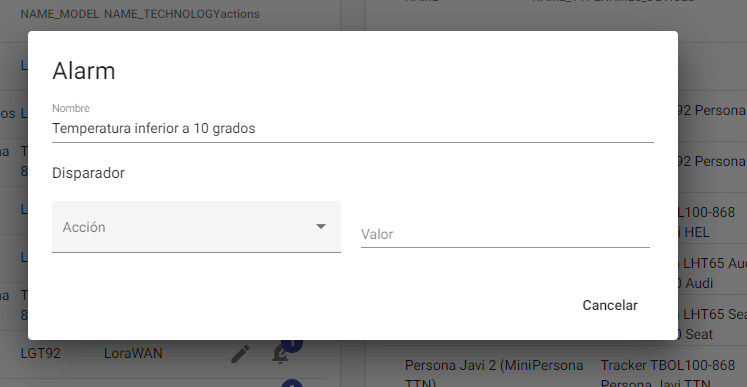
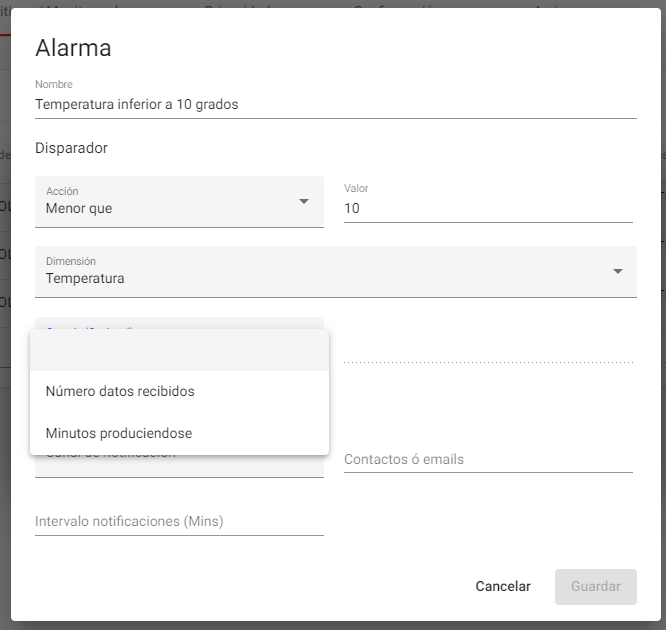
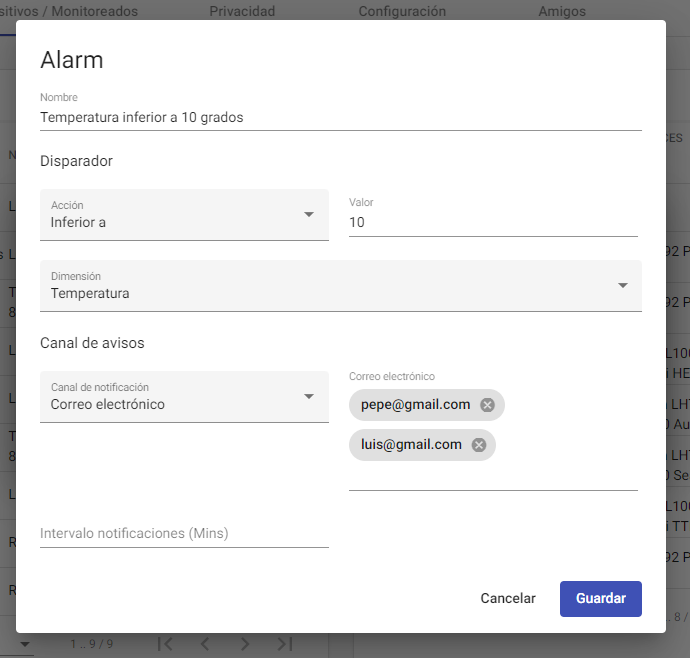
Put the name of the alarm that we are creating:
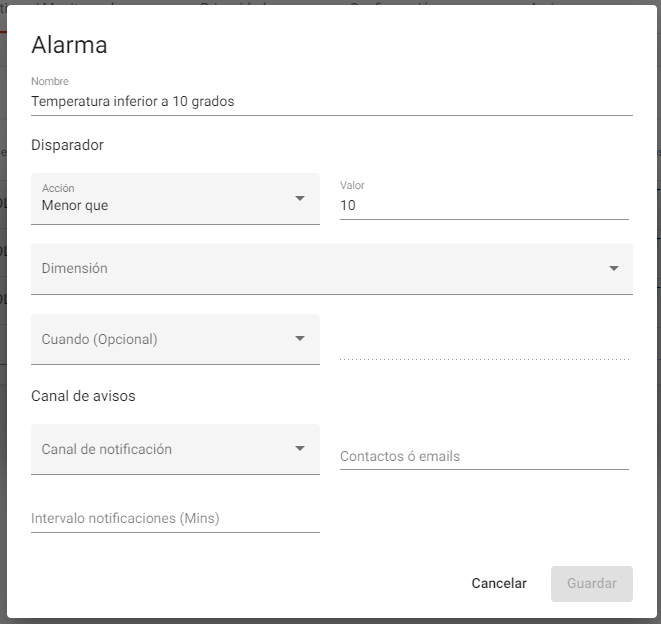
For example “Temperature below 10 degrees”.
And we will define the action of the alarm:
In the monitored we can configure many types of alarms and warnings giving the following parameters:
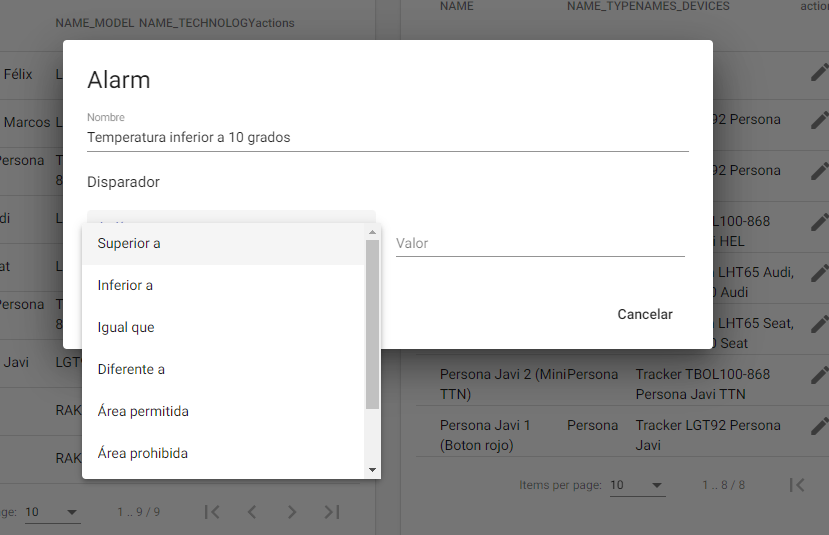
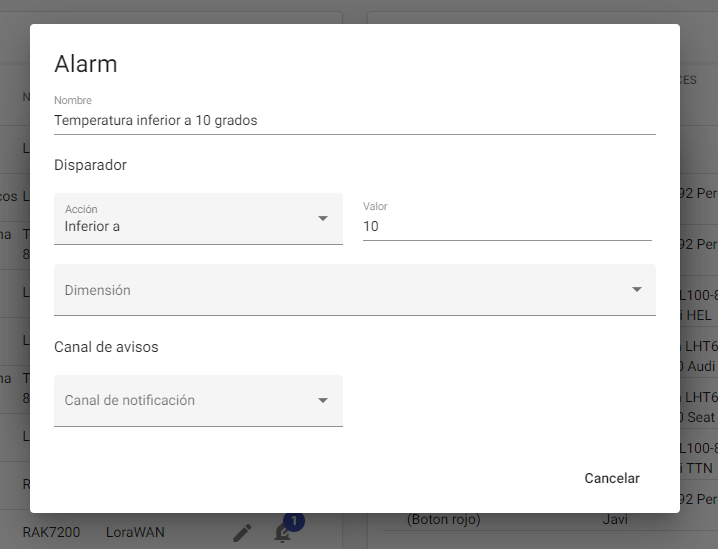
Trigger: “greater than”, “less than”, “equal to”, “different from”, “permitted area”, “prohibited area”. Allows you to trigger an alarm when a condition defined here is met. There are options to compare numbers, words, even area of a map.
Comparison alarm, upper and lower: It will give us warnings while the dimension triggered the defined condition. For example, if the condition is a temperature above 40 degrees, it will send us notices of this, while the temperature that the sensor is measuring is above 40 degrees. As soon as the temperature is equal to or less than 40 degrees, it will stop sending us notices. The time interval between the warnings is indicated in minutes when we set the alarm.
Prohibited area alarm: It notifies us when we enter the prohibited area zone that we have defined on the map when creating the alarm. While we stay inside it, it sends us emails. Keep sending emails until we get out of the forbidden zone. The time interval between the warnings is indicated in minutes when we set the alarm.
Allowed area alarm: It notifies us when we leave the allowed area zone that we have defined on the map when creating the alarm. While we stay out of it, she sends us emails. Continue sending emails until we enter the allowed zone. The time interval between the warnings is indicated in minutes when we set the alarm.
Value: Defines together with the trigger the conditions that must be met for it to be activated.
Once these values have been entered, it will ask us to define more:
Dimension: We must define in this field what is the dimension that triggers the alarm. It could be any of the ones that the sensor reads.
Field “when” is a combo to apply a delay in the alarm jump with the options:
– Number of data received: Prevents the alarm from triggering with the first data that meets the condition, it allows us to define that we must receive, for example, 3 data that meet the condition for the alarm to trigger.
– Minutes occurring: Prevents the alarm from going off with the first data that meets the condition, it allows us to define that data that meets the condition must be received for X minutes for the alarm to go off, for example 30 minutes receiving data that meets the condition for the alarm to go off.
The next field to be found is the notification channel.
Warning channel: It is the means by which the alarm notification will be sent. For example:
– Email: we must define the emails to which we want to notify
Notification interval (Minutes): It is the time that will elapse between one notification and the next. (it can be set to 1 hour, so it will send us an email every hour after the alarm condition is met).
In the example image, when a device informs us that there is a temperature below 10 degrees, the Atlas Locator system will send us the first warning.
At the hour, if it continues below 10 degrees, it will send us the second.
At 2 hours the third and so on every hour until the temperature rises above 10 degrees or we deactivate this alarm.
The activation or deactivation of the alarm can be done once this data has been saved:
We can create by repeating this process as many alarms as we need for that monitoring.
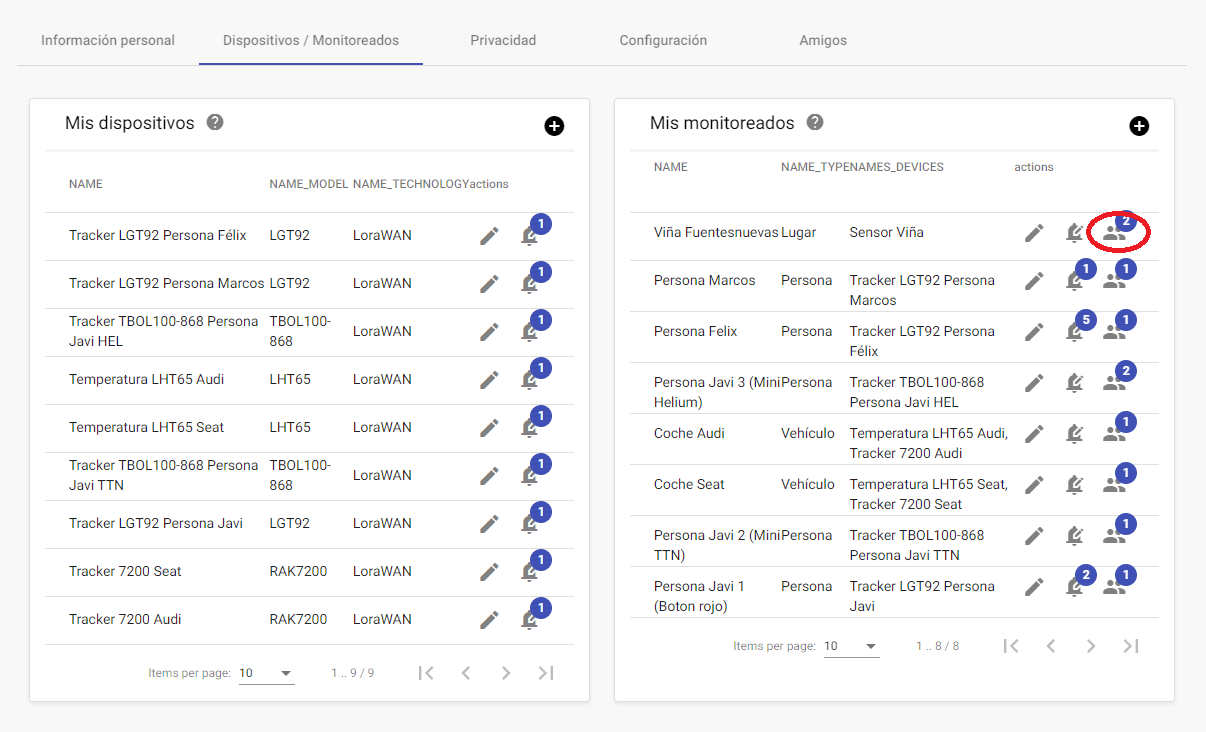
On the main screen for a monitored we also have the icon of a doll.
It helps us to share a monitoring with other users of the platform. If we enter it we will see this screen:
We can add the users of the Atlas Locator platform who will be able to access the monitored data, taking into account that there are 2 profiles when it comes to sharing:
– Administrator: Has full access to the monitored configuration with the possibility of sharing, editing, etc…
– Reader: You can only view the monitored data, but not edit its configuration, or share it, etc…
NOTE: To share a monitored with someone, we first have to add them as a friend on the platform, in the friends section.
This website uses cookies so that we can provide you with the best user experience possible. Cookie information is stored in your browser and performs functions such as recognising you when you return to our website and helping our team to understand which sections of the website you find most interesting and useful.
Strictly Necessary Cookies
Strictly Necessary Cookie should be enabled at all times so that we can save your preferences for cookie settings.
If you disable this cookie, we will not be able to save your preferences. This means that every time you visit this website you will need to enable or disable cookies again.
3rd Party Cookies
This website uses Google Analytics to collect anonymous information such as the number of visitors to the site, and the most popular pages.
Keeping this cookie enabled helps us to improve our website.
Please enable Strictly Necessary Cookies first so that we can save your preferences!