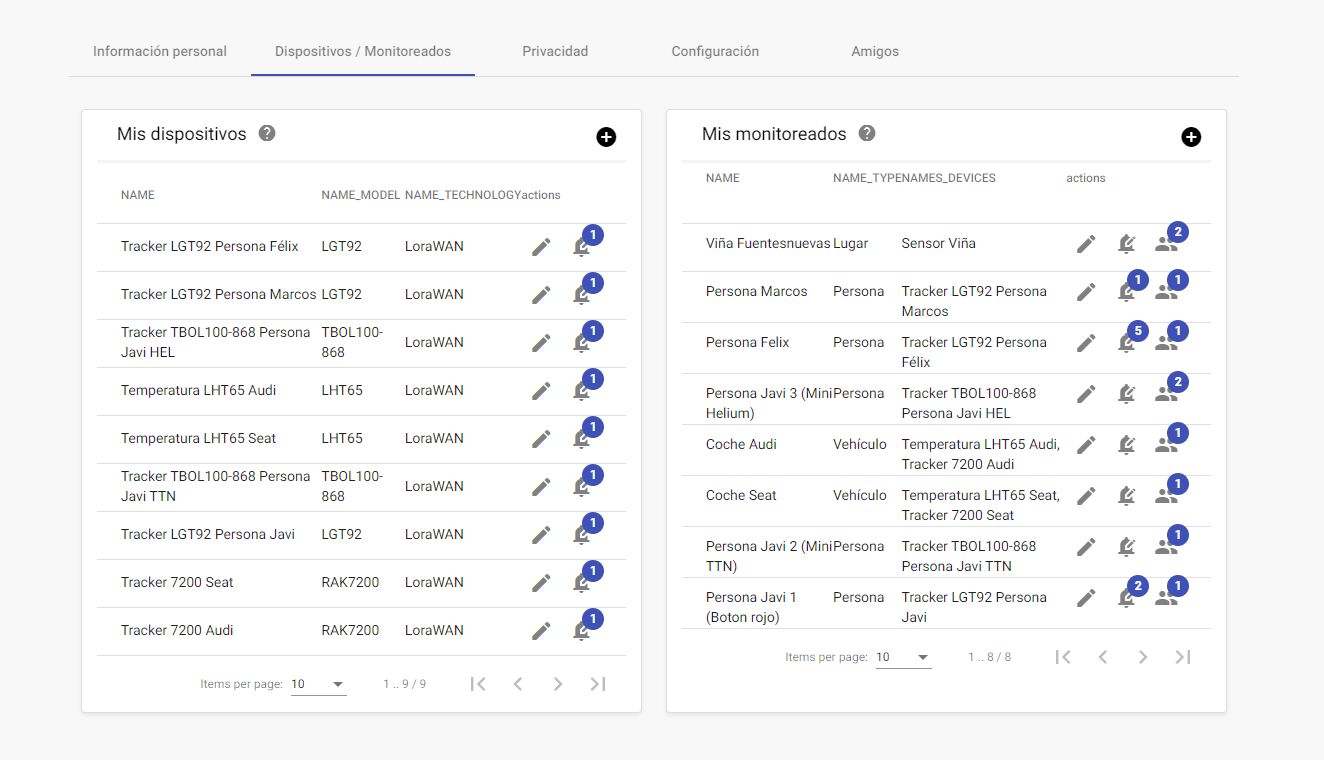
A device is a sensor that is added to a communications network (TTS (TTN & TTI), Helium…). The devices are registered on the platform and then associated with a monitored. If you do not create a monitored and associate a device with it, you will not be able to exploit the data of the device.
A monitored can have several associated devices, for example a temperature measuring device, a co2 measuring device, a lux measuring device,… all under the “Dining room” monitored.
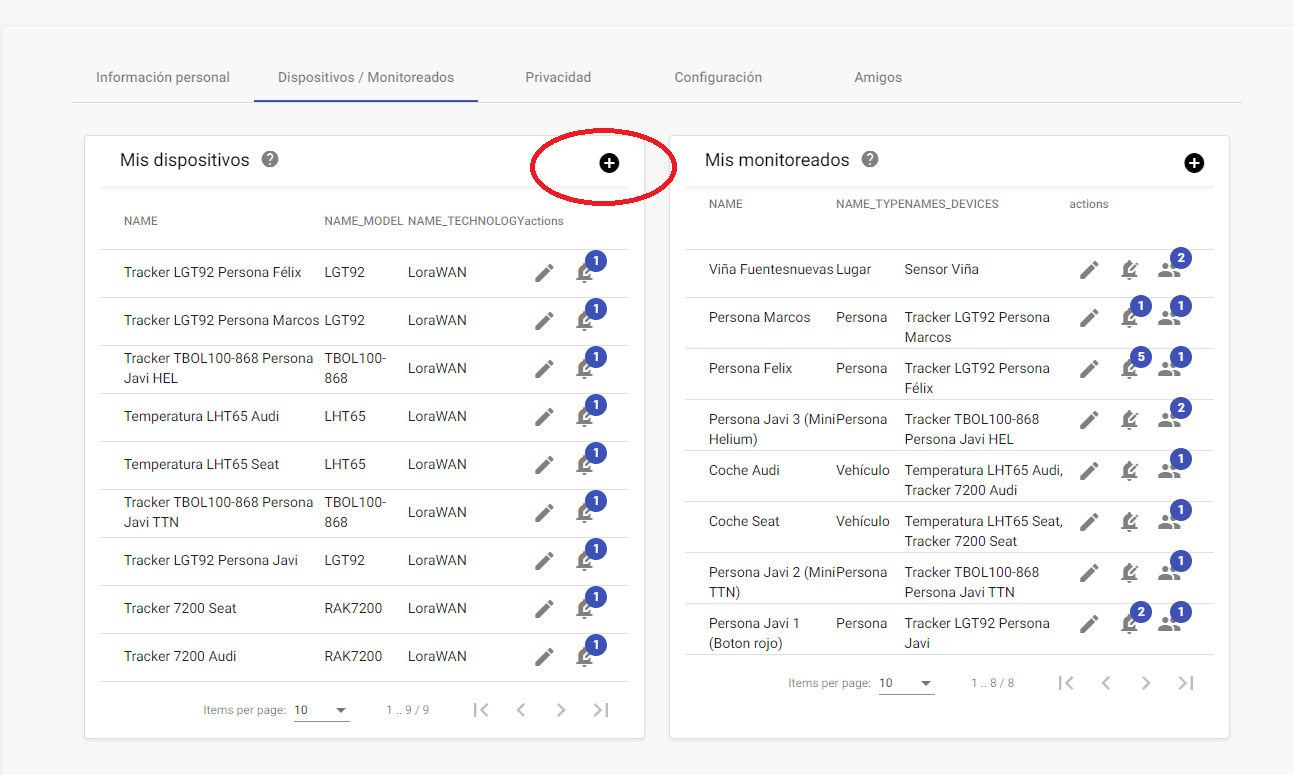
To register a device we must click on the +
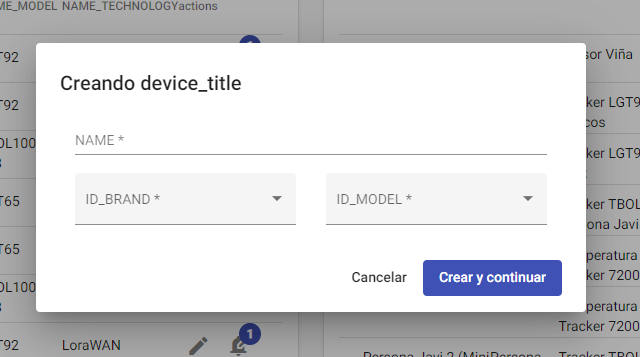
And this window will open
You must give it a name and select the brand and model of your device (in the case of your own device there is a CUSTOM brand, it is the first option in the drop-down, it may be hidden and you need to upload it to discover it).
And we will press the “Create and continue” button.
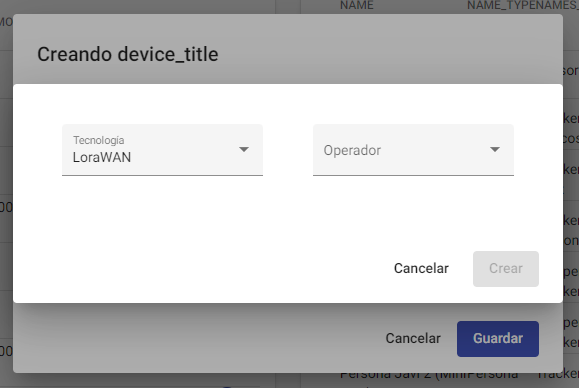
Then we must define which network it is connected to (TTS (TTN & TTI), Helium…) for which we must press + to define the technology and operator fields.
We will first select the Technology:
Then we will define the operator:
Finally, the corresponding network integration protocols must be configured.
Once all the previous fields have been configured, we exit completely, saving the data entered until the main screen.
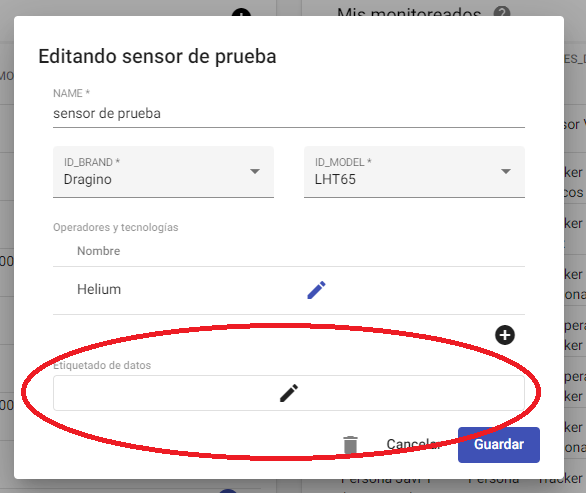
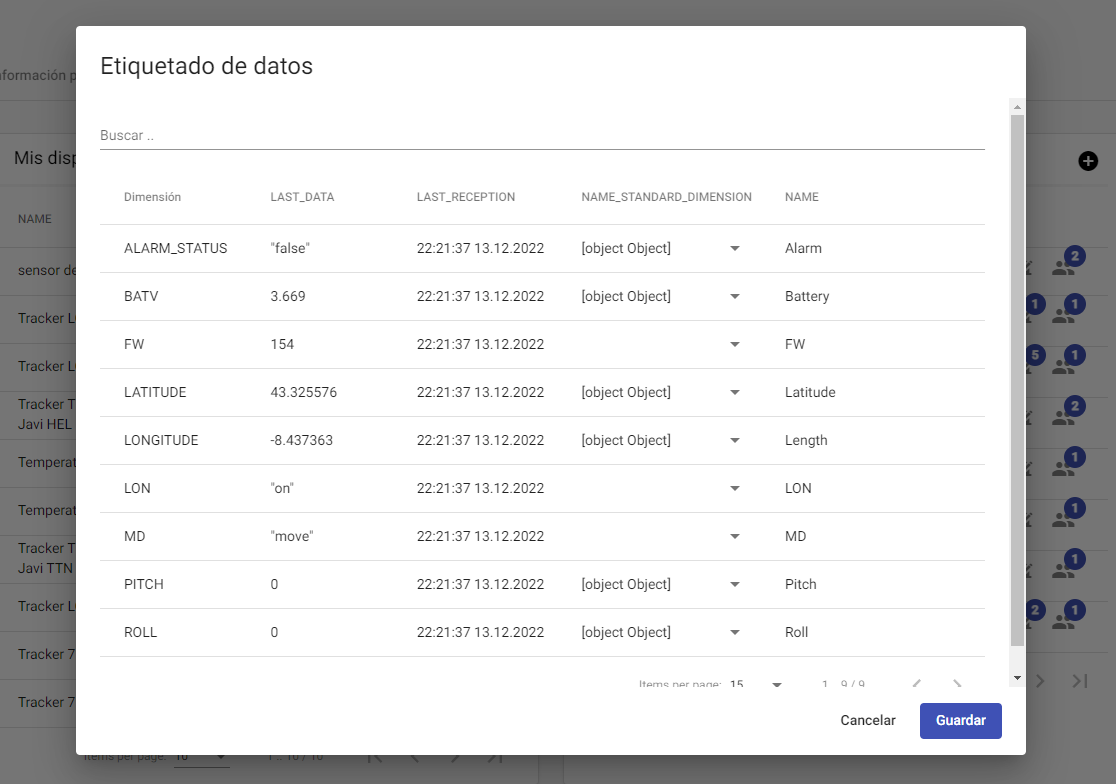
And we click on the pencil of the device that we have just created, we find a new section, data labeling.
This section is empty if the device has not yet received data.
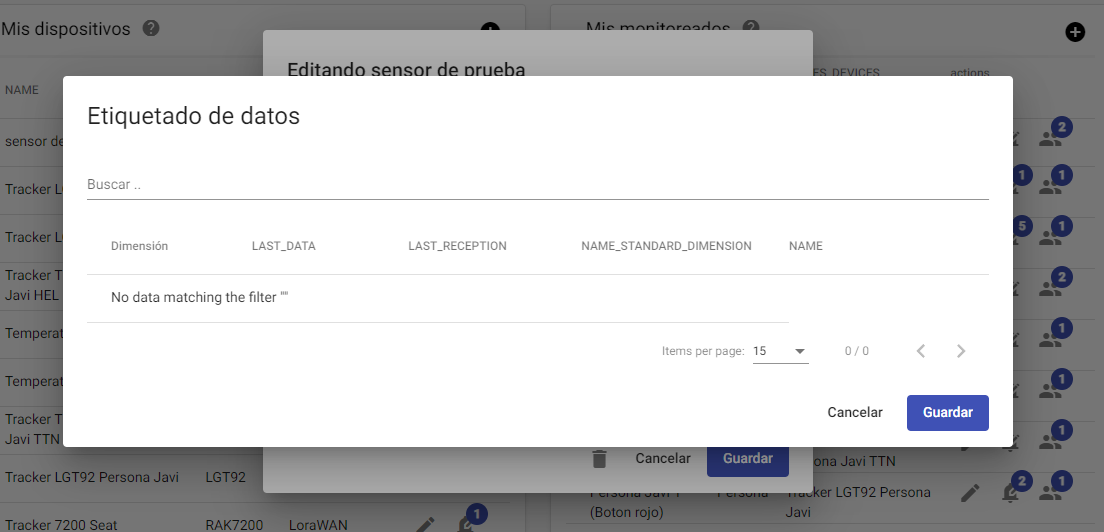
When it receives them, it shows something like this:
Where we can see what type of data our device receives, know its value and date, define the nature of the data and even customize it with a name. There is an intelligent system that will define all these fields by default but you can always come and change them by hand.
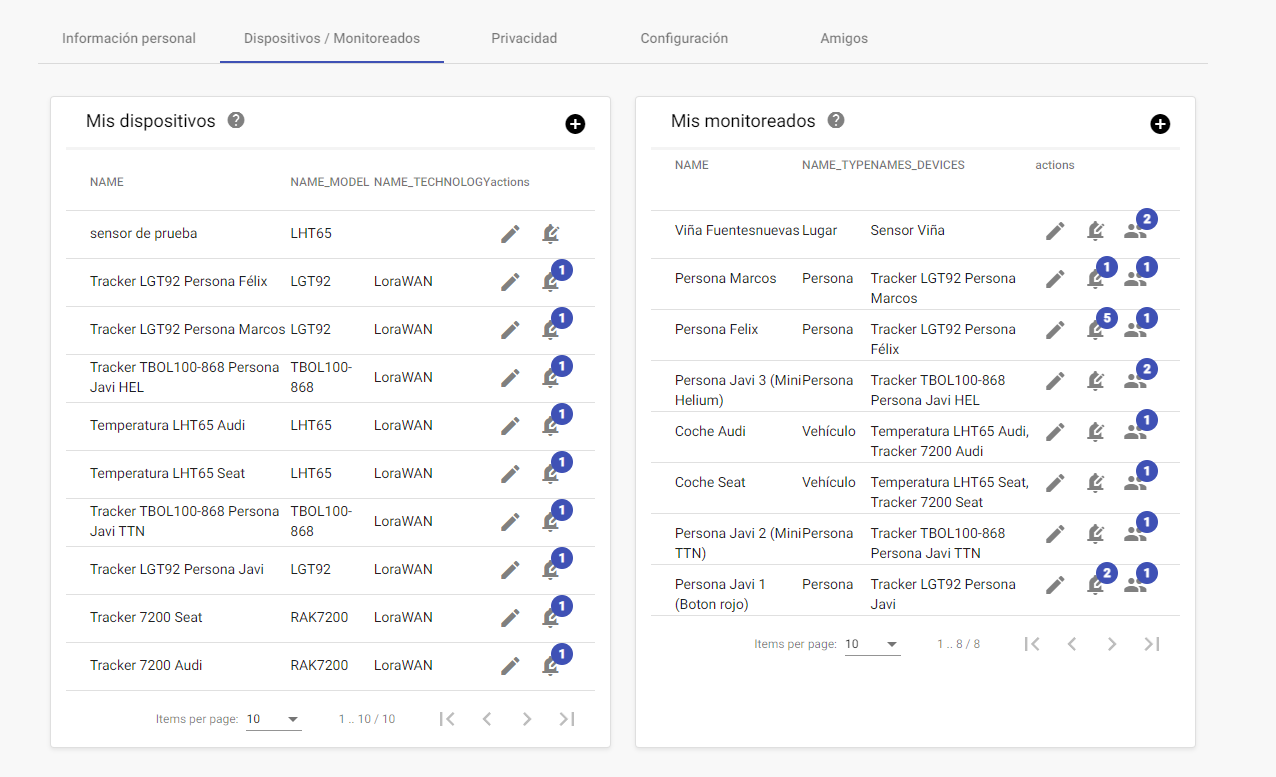
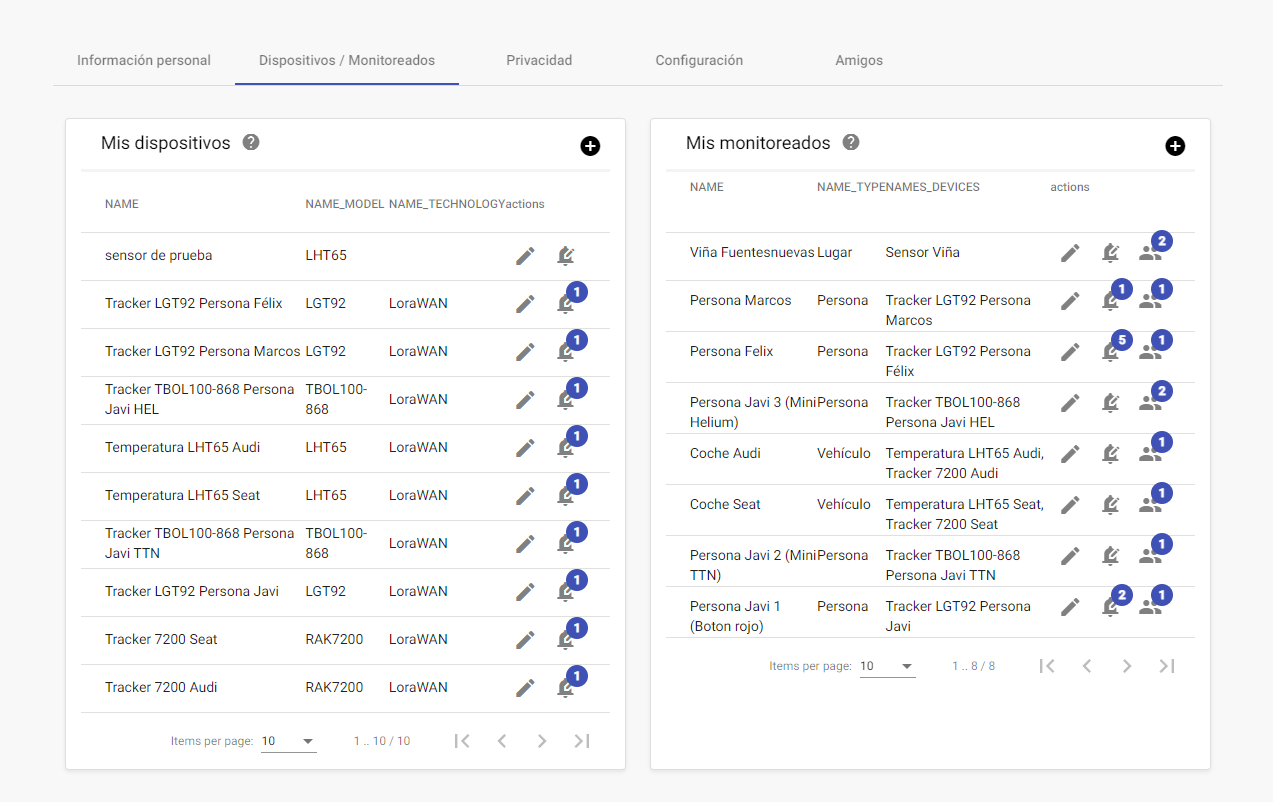
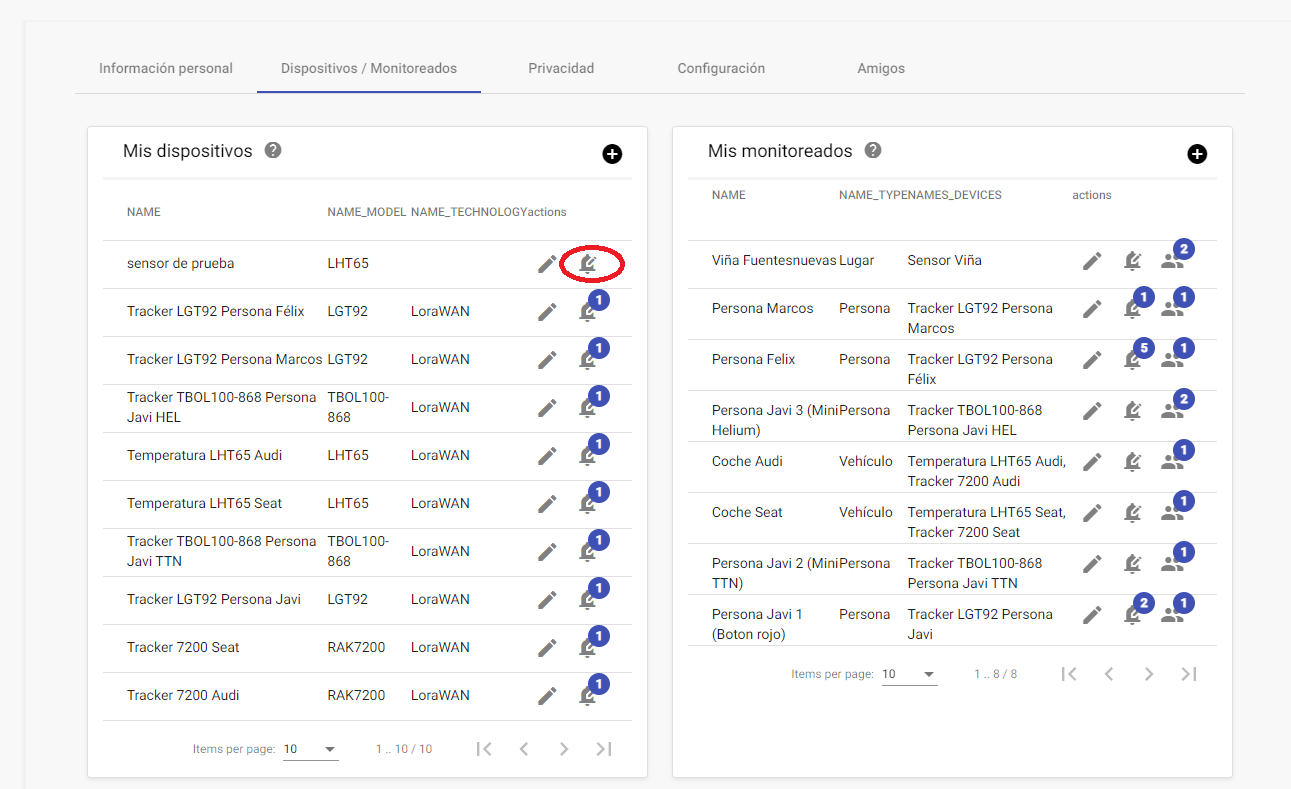
If we go back to the main screen:
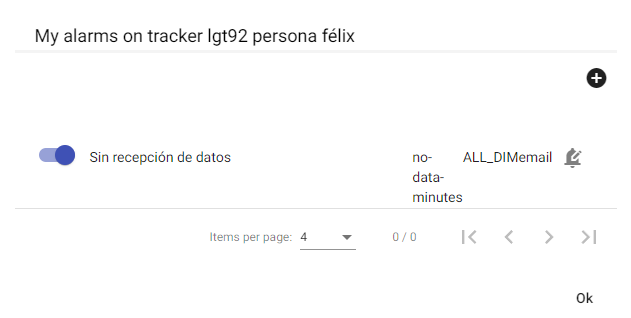
In the bell symbol of the device we can define the alarms. You can only define one type of alarm from the device alarms, the alarm of lack of data for a period of time, so that it notifies us if it runs out of battery or loses coverage, etc. The rest of the alarms according to the data received are configured at the monitoring level (not at the device).
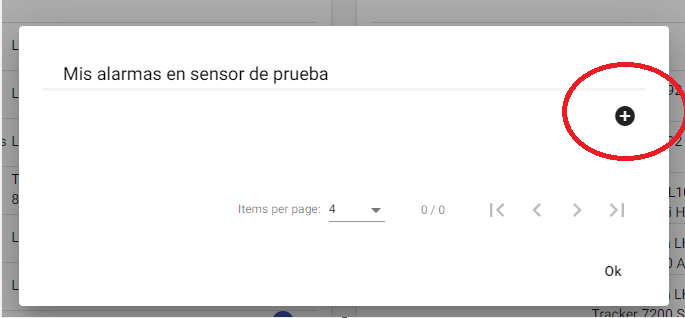
An alarm to warn of a lack of data from a device would be created by clicking on the bell:
Later in the +
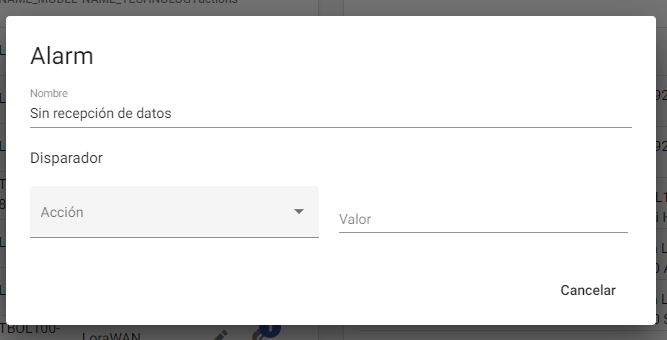
And we will define the name of the alarm:
When we enter the name, more fields will be shown:
Which we must cover as we wish to configure the alarm:
Action: The field does not allow you to choose any other possibility, it is only used for warnings of lack of data, as already mentioned, the warnings in relation to the received data are configured in the monitored ones.
Value: We define a value in minutes. It is the time that the system must wait to define that a device is no longer sending data (it can be set to 24 hours so that it will notify us when a device has not sent data to the platform for 24 hours).
Notification channel: It is the means by which the alarm notification will be sent. For example:
– Email: we must define the emails to which we want to notify
Notification interval (Minutes): It is the time that will elapse between one notification and the next. (it can be set to 4 hours, so it will send us an email every 4 hours after a device has been 24 hours without sending data).
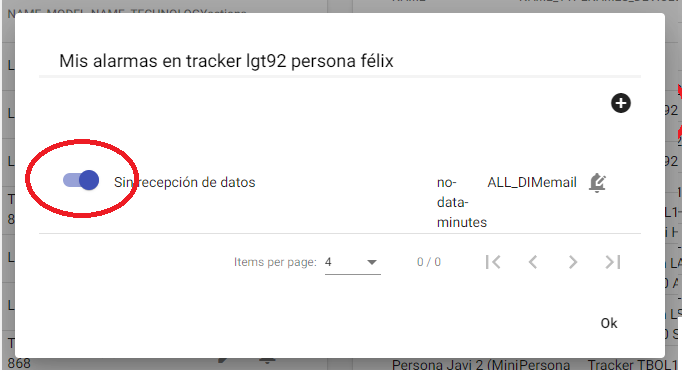
In the example image, when a device has not sent data to the Atlas Locator platform for 24 hours, the system will send us the first notice.
At 30 hours of the lack of data, he will send us the second.
At 34 hours the third and so on every 4 hours until data is sent from that device to the platform again or we deactivate this alarm.
The activation or deactivation of the alarm can be done once this data has been saved:
This website uses cookies so that we can provide you with the best user experience possible. Cookie information is stored in your browser and performs functions such as recognising you when you return to our website and helping our team to understand which sections of the website you find most interesting and useful.
Strictly Necessary Cookies
Strictly Necessary Cookie should be enabled at all times so that we can save your preferences for cookie settings.
If you disable this cookie, we will not be able to save your preferences. This means that every time you visit this website you will need to enable or disable cookies again.
3rd Party Cookies
This website uses Google Analytics to collect anonymous information such as the number of visitors to the site, and the most popular pages.
Keeping this cookie enabled helps us to improve our website.
Please enable Strictly Necessary Cookies first so that we can save your preferences!